• ODT Gun Show & Swap Meet - May 4, 2024! - Click here for info

Production Case Trimmer

I picked up a used rcbs for 45 bucks when making some 300blk brass. My cordless Craftsman drill chucked right up after pulling the handle and worked great for processing. Pretty happy with this setup, but I probably don't process the volume you do.
If you get a 300 blk at some point I'd like first shot at your 3x fired cases;)

If I already had an RCBS, then I would probably keep it and just upgrade to the new cutting head. Right now it looks like I can get into a Gracey (supplying my own motor OR using a power drill to drive it) for less / about the same as a powered RCBS with a pair of the new cutting heads.

I have a Gracey on order and will post my experience when I get it.


S&W just announced their 300 "Whisper" that will also acccept the 300 BLK .... Don't know much about it, but there's a lot of good feedback out there on the 300 BLK.
This is a possibility for me downthe road.
 
Ok, I got my Gracey in and It looks just fine ... but it is currently "motor less" as that's how I bought it.
Shipped "Motor Ready" and with both .223 and >308 Collets I spent $227 verses about $350 with their motor.

I also have in hand a couple of ebay motors that are identical, one will be placed on my Gracey, the other will become a
buffer / grinde with the addition of shaft arbors.

Once mated with the Gracey I will have ~ $265 invested in the Gracey and about $30 invested in a buffer / grinder.

I now know more about electric motors than I ever imagined, but (for me) that was part of the fun in doing the project this way!

Why isn't the unit totally installed and working right now? Well, rather than settle for a jury-rig of the shaft connection between the motor
and the Gracey, I have on order a 5/16" shaft to 3/8" bushing plus a 3/8" shaft collar (along with my shaft arbors) so that I have a "snug" fit to the
factory supplied flexible union on the Gracey drive shaft ... Grainger said that the parts will be here on the 22nd.

I am still going to post a synopsis of what I found out about production case trimmers, along with my experiences with the Gracey.
 
Mine was $162 to Florida from Grainger. :eek:

I feel your pain, but we all have gotten "whip-sawed" at least once or twice. I found the same motor at a place in Colorado called DRILLSPOT for $127 shipped, but was still too cheap to buy it.

Instead, I found something more like the factory motor at 1/15 HP and 1500 RPM's that works just fine.
Just got through hooking it up as my shaft bushings and collars got here today ... It works great!

That's what I lke about these forums, those that are kind enough to share their experiences are a real resource for those who don't have to suffer the learning curve (or costs) associated with pioneering! I really appreciate your sharing as it has been both an inspiration and cost / time saving to me!

Right now, I'm trying to fine-tune the chamfer on my unit, but quit for the evening as "she who must be obeyed" requested that I do so. Everything aligned and it runs very smooth ... the only sound is like an electric pencil sharpener when you put a case into it. I will likely get the Bob-Johnson (?) upgraded carbide trim blade a little later on, after I get some more experience with the thing.

I will be publishing some pictures and my write-up in a couple of few weeks, sooner if I can get the time to do so.

BTW: I have an identical spare motor, bushing, and shaft collar that I can sell locally FTF for $30 to anyone who wants to "Go Gracey" without investing a ton of money!
 
I got through about 400 +/- rounds in my first hour with the Gracey. There is somewhat of a learning curve as to how-to-best-do using any new tool, this plus quite a number of verifications on my Wilson Case Gauge.
The litttle machine performs well. At first, I was feeling my way and holding the cases like a pencil, not letting them spin, and not applying pressure. This produced slow results with a lot of "chattering" that showed up on the case mouths as well. Next, I gripped the suckers and pushed them in ... not a lot faster and really tiresome! The trick is to push the case into it and apply increasing pressure to case head while actually letting the case spin (some) ... this produced nice clean and (realtively) fast action. Oh, and YES, the thing really needs to be cleaned out after a couple hundred cuts. Otherwise it starts wanting to jam and stall (obviously).

I anticipate getting a carbide blade for it sometime in the future ... the stock blades are good, but they are not carbide! Bob Jones makes one, but lots of people have had problems with it being a little too thick to easily install ... I found that Giraud actually makes one that fits the Gracey ... for the same price as the Jones product. Giraud is a class act, I just wish that their unit was more affordable!

More later.
 
Last edited:
One "unintended consequence" in trimming a big pile of brass is the chaffe that ends up inside the case. This is aggrivated by any resizing lube that remains on / inside the case-neck. My normal proceedure is to trim then wash the brass in warm soapy water, rinse, then soak in a mild citric acid bath, rinse, dry and reload. This as opposed to previously placing them back into the vibirating case cleaner (and picking the media out of primer pockets!).

Suggestins?
 
Got questined on why I'm using a CITRIC ACID bath for the brass:

Two teaspoons per quart of hot water: Here's what I found (and it does work!)

Alright you chemistry experts --- does this weak acid treatment reduce the oxidized brass so that you don't lose metal (basically turning the copper/zinc oxide into copper and zinc metal) or does it just etch off some material and possibly slightly damage the brass???

Yes, exactly-- it essentially reduces the metal back to pure form. It does not etch brass at all. It does not leave any residue that can damage brass.

Neither phosphoric acid nor citric acid will damage brass when used as suggested, and one can even use up to a 10% solution. More concentrated will not hurt, but it will not help the process along much either. That's the great thing about both of these chemicals-- they actually help protect the brass during storage. The protective action is called passivation, and it means that the brass is made less prone to tarnish or corrode. Some industries use a citric acid wash on brass parts that will be stored for extended periods. It's about as safe as it gets.

In this application, citric acid and phosphoric acid are 'self-limiting', which means that once the dirt/tarnish/corrosion is gone, the acid stops working. So, no worry about carefully timing the washing process. It works so fast you can actually see it cleaning, and when the brass is clean and the tarnish removed, nothing more happens.

Note that citric acid is NOT self-limiting when used to remove rust from steel, and citric acid will etch steel if left soaking long enough.
 
Every time I think of citric acid, I think of orange and lemon juice. Seems somewhere in my mind I remember a pitted barrel that had orange juice spilled on it? I can't make myself eat an orange and go anywhere near one of my firearms?

I think about that most every time I add the orange smelling cleaning additive to the media in my tumbler.
 
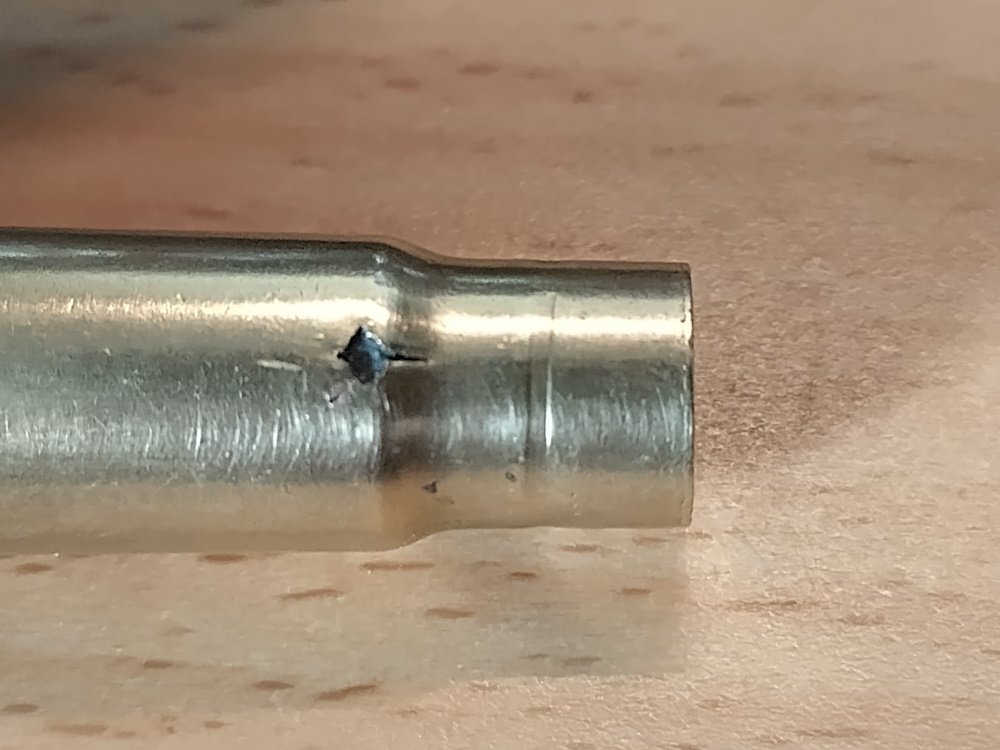
As promised, here's some pictures of my Gracey unit. Note the debris created, as well as the torn case necks of a couple of .223 NATO cases that I processed.
This was part of a package of 1300 pieces of once-fired LC Military brass ... If any of you have ever processed NATO brass, you will readily recognize the horrendous crimp that they place on them, and the problems in processing it! To have ONLY 2 out ot 1300 get torn like this is ... amazing! Please note the "Chaff" ... Shop vacuumed about every 200-300 cases ... and could have done more often!

i43.tinypic.com_34j9bgm.jpg

i43.tinypic.com_ipzkg8.jpg

i39.tinypic.com_2mdiix0.jpg

Above are the twin "stock" cutter blades at work: the inner blade trims & de-camfers, the outter-blade
deburrs. They (like the Giraud) need to be re-aligned for each new caliber set-up. Frustrating to learn how, but
easily done once you master the instruction (where you will learn how they work together). As stated before, I am acquiring
Giraud's single carbide blade replacement and will post my experiences with it later.
NOTE: Having an already-trimmed case makes the alignment work go MUCH faster and a lot smoother!
i42.tinypic.com_rmntrp.jpg

Shown above is the "universal" flexible motor-to-cutter shaft adapter
that's really just a piece of fuel hose, a couple of clamps, and my addition of
a 5/16" to 3/8" shaft bushing and 3/8" shaft collar. I also had to do some shimming
under both the motor and cutter frame to get the almost perfect alignment that is necessary
in order for the unit to work properly ... no difficult at all!
i42.tinypic.com_wssbbl.jpg

The above shows the factory supplied cover for the trimming chamber.
I'm considering how to replace it as it isn't very good or useful.
Note the Wilson Case Gauge, always check your work against a known / trusted quantity!
i42.tinypic.com_emu78.jpg

The above shows me "spinning" a case with my Lee Primer Pocket Tool
Just before trimming it. Since the motor I have has a double ended shaft,
I guess I could add a brush to the other end and clean the case insides at the same session.
However, that isn't likely with the small-mouth .223 cases ...No for me anyhow!
i40.tinypic.com_xpvwpt.jpg

The excessive crimp that LC NATO cases have on them can lead to
split necks even on once-fired brass ... better to let the Gracey find them than
my AR-15!
 
Last edited:
Back
Top Bottom