Front sight insert replacement & installation...
This thread is supposed to be a guide on how to replace a factory insert that has fallen out, is damaged, or loose. Or if you would just like to install one in your plain Baughman or ramp style front sight that is too hard to see. Please watch this video first.
If your front sight doesn't have an insert...
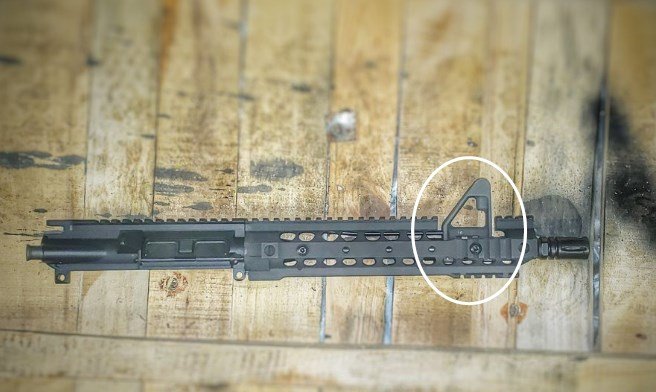
Buy a small set of jewelers files, make sure one of them is triangular shaped. The smaller, the better. I got a set at ACE Hardware for less than $10. Actually starting this process will make you feel like God himself might strike you down with a bolt of lightning, and if you are doing this to anything other than a shooter, God might really be considering it. Go slowly, go evenly and check both sides often. It is very important you only file a dovetail that fills up the rear sight. No more (in my opinion). I have seen some home made inserts that are way too long and it doesn't even look close to being factory. Not to mention how much easier it is to tell that your sights are lined up with a insert that only fills up the rear sight. Don't make your dovetail so deep that the bottom of the dovetail touches the barrel rib but deep enough to have a decent piece of acrylic to work with. Notice how I almost went too deep with the dovetail on the Model 15 below.
[Broken External Image]:
[Broken External Image]:
[Broken External Image]:
Dimpling with a punch or drilling 2 small holes...
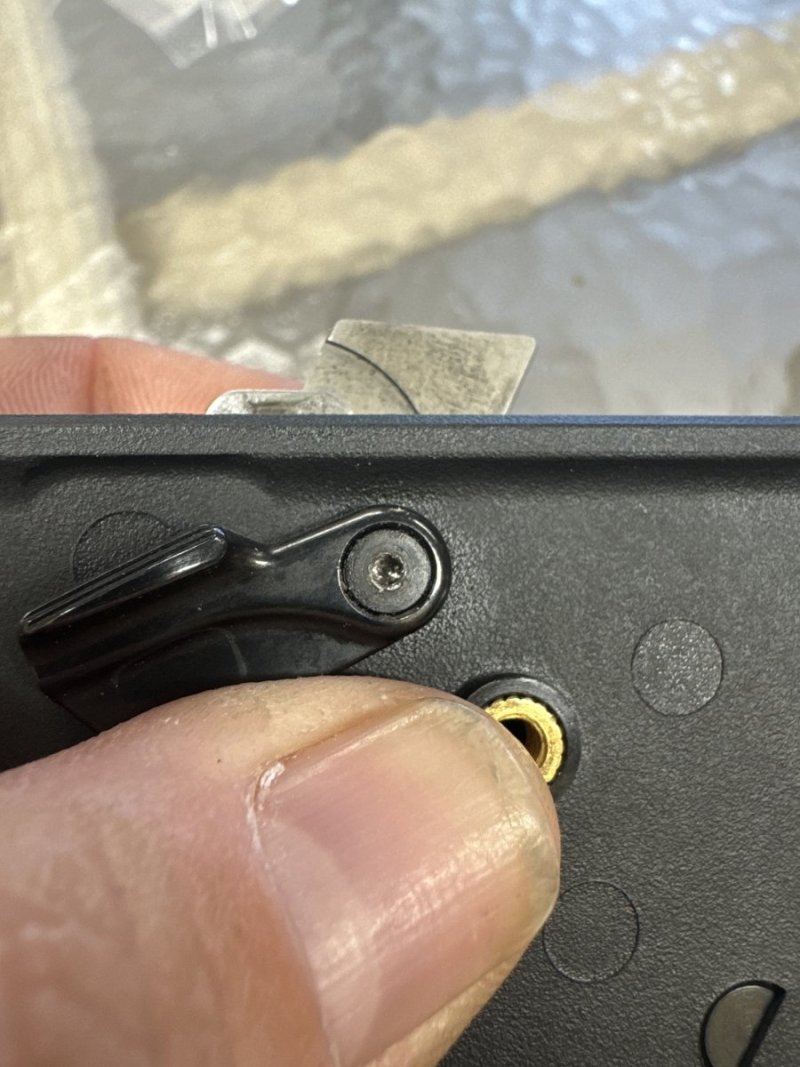
Once you have cut the dovetail in your front ramp like Larry Potterfield illustrates in the video, don't forget to dimple inside the dovetail with a centerpunch. I prefer a centerpunch because it causes a little metal to "roll" up into the space where the largest part of the insert is. It really helps keep the insert secure and in place. The factory however drills two very small holes down.
[Broken External Image]:
Method #1 Castin' Craft (polyester casting resin)
You will need some Castin Craft Resin, hardener, opaque red and yellow pigments, some mold releasing agent, some plastic cups, stir sticks for mixing. You will also need some brass fences, some vice grips, a small centerpunch, a hammer and some blue painters tape to protect the area around the front sight. I got all the material for the Castin' Craft insert at Hobby Lobby (except the files, the brass fences, the hammer, centerpunch and vice grips).
#1 - Polyester casting resin & hardener (catalyst)
[Broken External Image]:
#2 - Red pigment
[Broken External Image]:
#3 - Yellow pigment
[Broken External Image]:
The Fences...
You will need two brass fences that will squeeze each side of your front ramp. I used pieces from a thick brass hinge. I like the fences to be thick enough so that when I pinch down on them with the vice grips, and the front ramp in between, the teeth of the vice grips only touch the brass fences. You do still have to watch out for the barrel, but find fences that stick out on each side past the width of the rib. Make sure they are flat and clean. I laid the fences on a file and flattened the sides of the fences that would be facing the resin. Clean them off and spray the Castin Craft Releasing Agent (don't forget to shake the bottle). Let the fences dry and clamp them on your front sight.
[Broken External Image]:
The Mix...
I use about 2 ounces of Polyester Resin in a plastic mixing cup. I put 3-4 drops of yellow pigment in and 1 drop of red pigment in, and mix it well. I put 4-5 drops of hardener in it and mixed it very well, scraping everything off the edges and bottom of the cup and mixing it again. My first attempt I used 3-4 drops of red and 1-2 drops of yellow. A little of the red pigment goes a long way.
[Broken External Image]:
This thread is supposed to be a guide on how to replace a factory insert that has fallen out, is damaged, or loose. Or if you would just like to install one in your plain Baughman or ramp style front sight that is too hard to see. Please watch this video first.
If your front sight doesn't have an insert...
Buy a small set of jewelers files, make sure one of them is triangular shaped. The smaller, the better. I got a set at ACE Hardware for less than $10. Actually starting this process will make you feel like God himself might strike you down with a bolt of lightning, and if you are doing this to anything other than a shooter, God might really be considering it. Go slowly, go evenly and check both sides often. It is very important you only file a dovetail that fills up the rear sight. No more (in my opinion). I have seen some home made inserts that are way too long and it doesn't even look close to being factory. Not to mention how much easier it is to tell that your sights are lined up with a insert that only fills up the rear sight. Don't make your dovetail so deep that the bottom of the dovetail touches the barrel rib but deep enough to have a decent piece of acrylic to work with. Notice how I almost went too deep with the dovetail on the Model 15 below.
[Broken External Image]:
[Broken External Image]:
[Broken External Image]:
Dimpling with a punch or drilling 2 small holes...
Once you have cut the dovetail in your front ramp like Larry Potterfield illustrates in the video, don't forget to dimple inside the dovetail with a centerpunch. I prefer a centerpunch because it causes a little metal to "roll" up into the space where the largest part of the insert is. It really helps keep the insert secure and in place. The factory however drills two very small holes down.
[Broken External Image]:
Method #1 Castin' Craft (polyester casting resin)
You will need some Castin Craft Resin, hardener, opaque red and yellow pigments, some mold releasing agent, some plastic cups, stir sticks for mixing. You will also need some brass fences, some vice grips, a small centerpunch, a hammer and some blue painters tape to protect the area around the front sight. I got all the material for the Castin' Craft insert at Hobby Lobby (except the files, the brass fences, the hammer, centerpunch and vice grips).
#1 - Polyester casting resin & hardener (catalyst)
[Broken External Image]:
#2 - Red pigment
[Broken External Image]:
#3 - Yellow pigment
[Broken External Image]:
The Fences...
You will need two brass fences that will squeeze each side of your front ramp. I used pieces from a thick brass hinge. I like the fences to be thick enough so that when I pinch down on them with the vice grips, and the front ramp in between, the teeth of the vice grips only touch the brass fences. You do still have to watch out for the barrel, but find fences that stick out on each side past the width of the rib. Make sure they are flat and clean. I laid the fences on a file and flattened the sides of the fences that would be facing the resin. Clean them off and spray the Castin Craft Releasing Agent (don't forget to shake the bottle). Let the fences dry and clamp them on your front sight.
[Broken External Image]:
The Mix...
I use about 2 ounces of Polyester Resin in a plastic mixing cup. I put 3-4 drops of yellow pigment in and 1 drop of red pigment in, and mix it well. I put 4-5 drops of hardener in it and mixed it very well, scraping everything off the edges and bottom of the cup and mixing it again. My first attempt I used 3-4 drops of red and 1-2 drops of yellow. A little of the red pigment goes a long way.
[Broken External Image]:
Last edited: