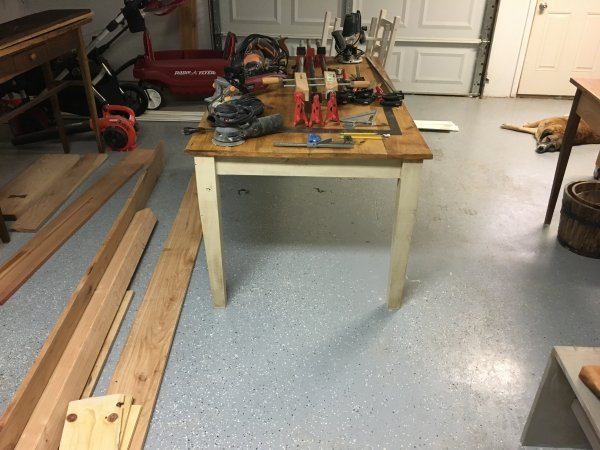
You'll need:
Home Depot:
Chop
Legs:
Base:
Home Depot:
- (1) 1x12x12 Band Sawn Eastern White Pine
- (1) 1x8x12 Band Sawn Eastern White Pine
- (2) 1x4x12 Band Sawn Eastern White Pine
- (1) 4x4 Kiln Dried Douglas Fir
- (1) 1x2x8 either poplar or red oak
- (1) 3ft of 1/4" or 3/8" oak round stock (dowels)
- (1) pack of table top fasteners
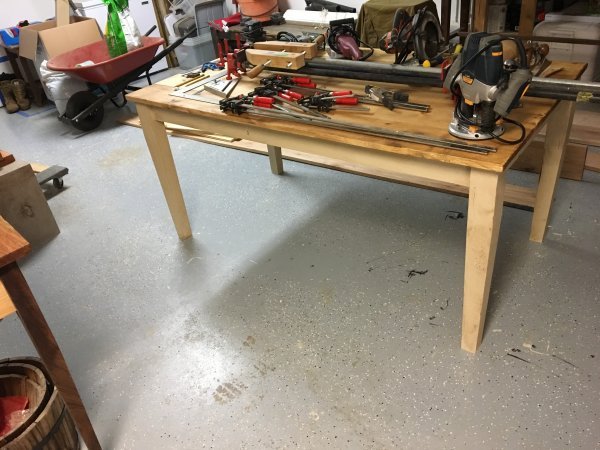
Chop
- Top: 1x12x12 and 1x8x12 to (4) @ 72"
- Aprons: 1x4x12 to (2) @ 61.5", (2) @ 25.5"
- Supports: 1x2x6 poplar or red oak (3) @ 30"
- Legs: 4x4 to (4) @ 30"
- Pegs: oak round stock (16) @ 5" (you'll also need to taper one end of each peg)
- Depending on how rustic you want it, plane boards or don't
- Get a straight edge on one side of each board.
- Rip opposing sides
- Biscuit join and glue top together, use cauls to keep it flat
Legs:
- Mark the end grain on each leg; A,B,C,D
- Mark tenon locations on all legs
- Using a router, chisel, or mortiser; mortise 1/2"W x 2.5"L x 1.5"D mortises
- Drill holes in outside of mortise location through the mortise and into the opposing side of leg. These are for the pegs.
- Mark your tenons: Tenon dimensions are same as mortise except the depth is 1/8" less than the depth of the mortise.
- Cut your tenons with a hand saw, band saw, tenoning jig, router, or something else.
- Drill (4-6) holes in the edge of the red oak or poplar and elongate all holes except (1) hole that will align with the 1x12's.
Base:
- Dry fit the aprons into the legs, ensuring they are square.
- With a brad point bit of the same diameter as the peg hole, mark all tenons through the hole you've drilled for the peg.
- Mark 1/32" towards the tenon shoulder and drill a hole through the tenon.
- Glue mortise and tenons and assemble.
- Drive pegs tapered end first and apply a dab of glue on the final 1/2".
- With the biscuit joiner; ensure the blade height is level with the table top fasteners and cut (6-8) slots on the inside top of aprons.
- Flip the top over and drill the supports to the top. Make sure you have elongated holes on the outer boards as the top will contract this winter.
- Put the top on the base and align.
- Get under the table and install table top fasteners.