Okay, I expect this is going to garner me a metric tonne of flak, but in reading and learning on this informative site over the past few years, I started developing a theorem . . . . . . .
Basically, your really don't need to dump a ton of dollars into precision machined ignition parts to get substantial improvement in your perceived 1911 trigger pull.
There, I went and said it. I too have gone out and bought precision engineered ignition parts (sear, disconnector, hammer, trigger, pins even) from the best and most notable manufacturers out there. Did I get improvements? Heck yeah, but I mean, SOME of my guns I want - I NEED - to get trigger improvements, but the gun itself isn't worth dumping $125, $150, $200 or more into great parts just to make it more enjoyable to shoot.
So I set out to prove to myself, and to anyone who was interested, that taking what I have learned from all of the 1911 Addicts who are WAY more knowledgeable than myself on this great forum, a few abrasive stones, screwdrivers, sandpaper, a hammer, a file or two, some oil, and a Lyman Trigger Pull Gauge, that I could make SIGNIFICANT improvements in trigger pull to even the most crappy of my guns, WITHOUT spending a dime on parts.
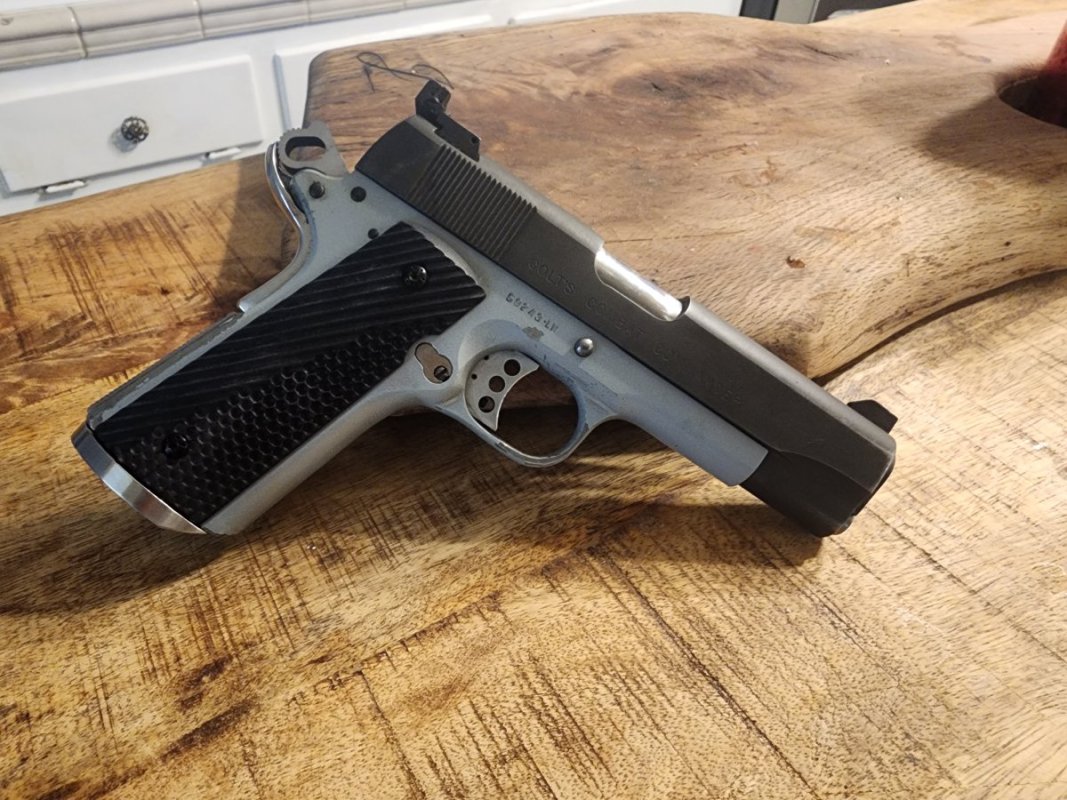
Case study #1: Deadpool

I figured that NOBODY could find a bigger challenge that this old gun. It's internals look ALMOST as rough as the outside. Those of you who had the opportunity to shoot this one at one of the range outings can attest - Deadpool has a really crappy trigger pull.
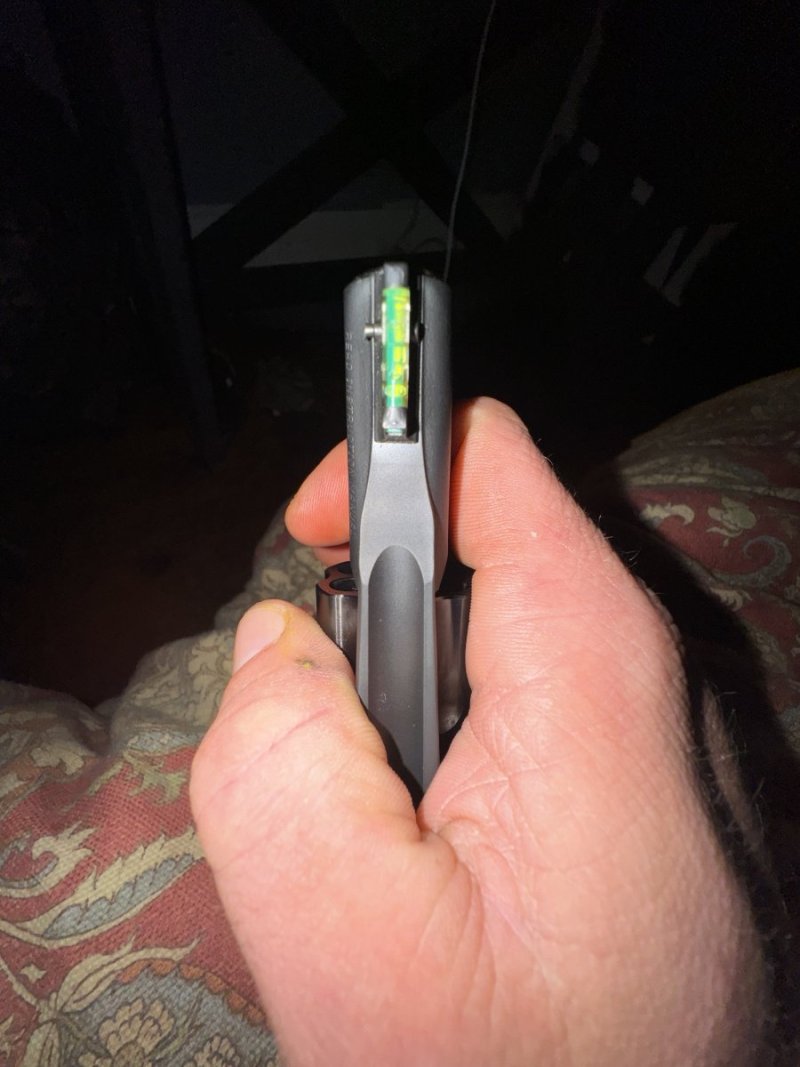
As it sits, it varies between 7 lbs and 8 lbs on a good day. Below is a photo of the BEST pull I could measure out of six or seven measurements made before I began my work.

Anyway, I proceeded to clean Deady up using all the original parts, just as I got it.
One quick disclaimer: Seeing as Deadpool is over 100 years old and apparently spent much of its life as an "urban outdoorsman" before I came into possession of him, I cannot say for certain that its sear, sear spring, mainspring, and disconnector are original. I know from appearances that the thumb safety has been replaced, but not the grip safety.
From all appearances however, the pins, hammer, trigger, MSH, and hammer strut ARE original (or at least as "weathered" as the rest of the gun). I did not replace any parts, springs, or pins for this test. I only used the tools I have on-hand to clean the parts up, polish, and tune everything in the ignition assembly.
I have owned Deadpool for about four or five years now. I get him out to the range occasionally to show him off and for the "street cred" that owning a functioning 103 year old 1911 brings. It wasn't clean when I bought it, and I never fully detail stripped and cleaned it in all the years I have owned it. Most I remember doing, was running a bore snake through it once or twice.
Also, regrets in advance for NOT taking photos of each step in the following processes. I was squeezing these improvements in sitting at my desk at work and didn't have time to do proper photo shoots. Anyway, . . . . . .
First task at hand was to smooth and polish the trigger and trigger track. The original trigger looked like it had been coated with the heaviest application of cerakote you've ever seen. I could invert the gun with all other parts removed, and the trigger would stay put. I polished the trigger bow (heavy cast steel, not thin lightweight stainless like modern triggers) removing the high spots. I polished the trigger track in the frame, sides top and bottom. I cleaned out all the gunk I could reach (first time I ever fully detail stripped this gun) and liberally oiled everything. Once this was done, the trigger slid in and out of the track via gravity. No more grit, no hangups. I even polished the inside of the trigger bow to allow the magazine to slide in and out more smoothly. An extra bonus. Nice.
Second task at hand was smoothing and polishing the hammer gap. The hammer felt gritty moving within the frame. I smoothed out the contact between the sides of the hammer and the hammer gap in the frame. Not sure if this affects trigger pull, but why not clean it up anyway?
Third step was addressing the sear and disconnector. These had so much gunk on them, they were almost "welded" together. A lot of cleaning revealed that all metal on metal surfaces were still rough - again, it looked like they were coated with cerakote or parkerized. I polished the face of the disconnector where the sear spring contacts it. I polished the sear nose using a stoning jig. Polished and cleaned out the frame where the sear sits. I polished the sear pin and hammer pin. I polished and cleaned the crap out of everything in these areas.
Final step, addressing the hammer hooks. These were a tad long and looked as though they had never been polished - looking like they were parkerized. I think the hammer hooks were even ground to an angle of LESS than 90 degrees, because it felt as though the sear had to travel "uphill" to clear the hooks. The sear was really binding a bit under the hooks, so I corrected the geometry to 90 degrees, shortened them a bit, and polished everything up real nice.
I adjusted the right leaf on the sear spring slightly to give MORE pressure to the grip safety so it wouldn't rattle when shaken. Other than that, all I did to that old spring was polish the nose of the center leaf where it contacted and slid against the disconnector, and made sure it had sufficient contact with the disconnector. I made sure that its travel was effortless.
After everything was cleaned up and polished, I reassembled ALL THE ORIGINAL PARTS AND SPRINGS back into Deadpool and gave it a test. Results below.

I am confident that I could do a little more work to Deady to get the trigger pull down closer to 3.0 lbs, but I am totally satisfied with where he now sits. I have a little more I want to do to eliminate some of the "pre-travel" of this ancient trigger. I learned a little trick from a post that Joe Chambers made about seven or eight years ago on modifying a trigger to add a little "pre-travel" adjustment tab to a trigger that doesn't have one. It would be nice if this trigger had an over-travel adjustment screw, but I can epoxy in a small block of wood on the back side of the trigger to manage that, like I did on one of the early triggers I used in my ZOIDS1911 build.
Now I am not advocating that you forgo purchasing the best tool steel ignition parts for the next custom build you are looking to do, but the next time you think about getting rid of your old truck gun because it isn't worth sending in for a trigger job, maybe you might want to reconsider (or sell it to me, because I LOVE getting old unloved 1911's to function).
Again, regrets for not taking pictures along the way. I appreciate your thoughts and comments.
 Cat Herder
, this thread is for you.
Cat Herder
, this thread is for you.
Z
Basically, your really don't need to dump a ton of dollars into precision machined ignition parts to get substantial improvement in your perceived 1911 trigger pull.
There, I went and said it. I too have gone out and bought precision engineered ignition parts (sear, disconnector, hammer, trigger, pins even) from the best and most notable manufacturers out there. Did I get improvements? Heck yeah, but I mean, SOME of my guns I want - I NEED - to get trigger improvements, but the gun itself isn't worth dumping $125, $150, $200 or more into great parts just to make it more enjoyable to shoot.
So I set out to prove to myself, and to anyone who was interested, that taking what I have learned from all of the 1911 Addicts who are WAY more knowledgeable than myself on this great forum, a few abrasive stones, screwdrivers, sandpaper, a hammer, a file or two, some oil, and a Lyman Trigger Pull Gauge, that I could make SIGNIFICANT improvements in trigger pull to even the most crappy of my guns, WITHOUT spending a dime on parts.
Case study #1: Deadpool
I figured that NOBODY could find a bigger challenge that this old gun. It's internals look ALMOST as rough as the outside. Those of you who had the opportunity to shoot this one at one of the range outings can attest - Deadpool has a really crappy trigger pull.
As it sits, it varies between 7 lbs and 8 lbs on a good day. Below is a photo of the BEST pull I could measure out of six or seven measurements made before I began my work.
Anyway, I proceeded to clean Deady up using all the original parts, just as I got it.
One quick disclaimer: Seeing as Deadpool is over 100 years old and apparently spent much of its life as an "urban outdoorsman" before I came into possession of him, I cannot say for certain that its sear, sear spring, mainspring, and disconnector are original. I know from appearances that the thumb safety has been replaced, but not the grip safety.
From all appearances however, the pins, hammer, trigger, MSH, and hammer strut ARE original (or at least as "weathered" as the rest of the gun). I did not replace any parts, springs, or pins for this test. I only used the tools I have on-hand to clean the parts up, polish, and tune everything in the ignition assembly.
I have owned Deadpool for about four or five years now. I get him out to the range occasionally to show him off and for the "street cred" that owning a functioning 103 year old 1911 brings. It wasn't clean when I bought it, and I never fully detail stripped and cleaned it in all the years I have owned it. Most I remember doing, was running a bore snake through it once or twice.
Also, regrets in advance for NOT taking photos of each step in the following processes. I was squeezing these improvements in sitting at my desk at work and didn't have time to do proper photo shoots. Anyway, . . . . . .
First task at hand was to smooth and polish the trigger and trigger track. The original trigger looked like it had been coated with the heaviest application of cerakote you've ever seen. I could invert the gun with all other parts removed, and the trigger would stay put. I polished the trigger bow (heavy cast steel, not thin lightweight stainless like modern triggers) removing the high spots. I polished the trigger track in the frame, sides top and bottom. I cleaned out all the gunk I could reach (first time I ever fully detail stripped this gun) and liberally oiled everything. Once this was done, the trigger slid in and out of the track via gravity. No more grit, no hangups. I even polished the inside of the trigger bow to allow the magazine to slide in and out more smoothly. An extra bonus. Nice.
Second task at hand was smoothing and polishing the hammer gap. The hammer felt gritty moving within the frame. I smoothed out the contact between the sides of the hammer and the hammer gap in the frame. Not sure if this affects trigger pull, but why not clean it up anyway?
Third step was addressing the sear and disconnector. These had so much gunk on them, they were almost "welded" together. A lot of cleaning revealed that all metal on metal surfaces were still rough - again, it looked like they were coated with cerakote or parkerized. I polished the face of the disconnector where the sear spring contacts it. I polished the sear nose using a stoning jig. Polished and cleaned out the frame where the sear sits. I polished the sear pin and hammer pin. I polished and cleaned the crap out of everything in these areas.
Final step, addressing the hammer hooks. These were a tad long and looked as though they had never been polished - looking like they were parkerized. I think the hammer hooks were even ground to an angle of LESS than 90 degrees, because it felt as though the sear had to travel "uphill" to clear the hooks. The sear was really binding a bit under the hooks, so I corrected the geometry to 90 degrees, shortened them a bit, and polished everything up real nice.
I adjusted the right leaf on the sear spring slightly to give MORE pressure to the grip safety so it wouldn't rattle when shaken. Other than that, all I did to that old spring was polish the nose of the center leaf where it contacted and slid against the disconnector, and made sure it had sufficient contact with the disconnector. I made sure that its travel was effortless.
After everything was cleaned up and polished, I reassembled ALL THE ORIGINAL PARTS AND SPRINGS back into Deadpool and gave it a test. Results below.
I am confident that I could do a little more work to Deady to get the trigger pull down closer to 3.0 lbs, but I am totally satisfied with where he now sits. I have a little more I want to do to eliminate some of the "pre-travel" of this ancient trigger. I learned a little trick from a post that Joe Chambers made about seven or eight years ago on modifying a trigger to add a little "pre-travel" adjustment tab to a trigger that doesn't have one. It would be nice if this trigger had an over-travel adjustment screw, but I can epoxy in a small block of wood on the back side of the trigger to manage that, like I did on one of the early triggers I used in my ZOIDS1911 build.
Now I am not advocating that you forgo purchasing the best tool steel ignition parts for the next custom build you are looking to do, but the next time you think about getting rid of your old truck gun because it isn't worth sending in for a trigger job, maybe you might want to reconsider (or sell it to me, because I LOVE getting old unloved 1911's to function).
Again, regrets for not taking pictures along the way. I appreciate your thoughts and comments.
Z