• ODT Gun Show & Swap Meet - May 4, 2024! - Click here for info

The Packhorse

In the damp box. 90% humidity. Crock of water set on the lowest of three settings (warm, low, high).

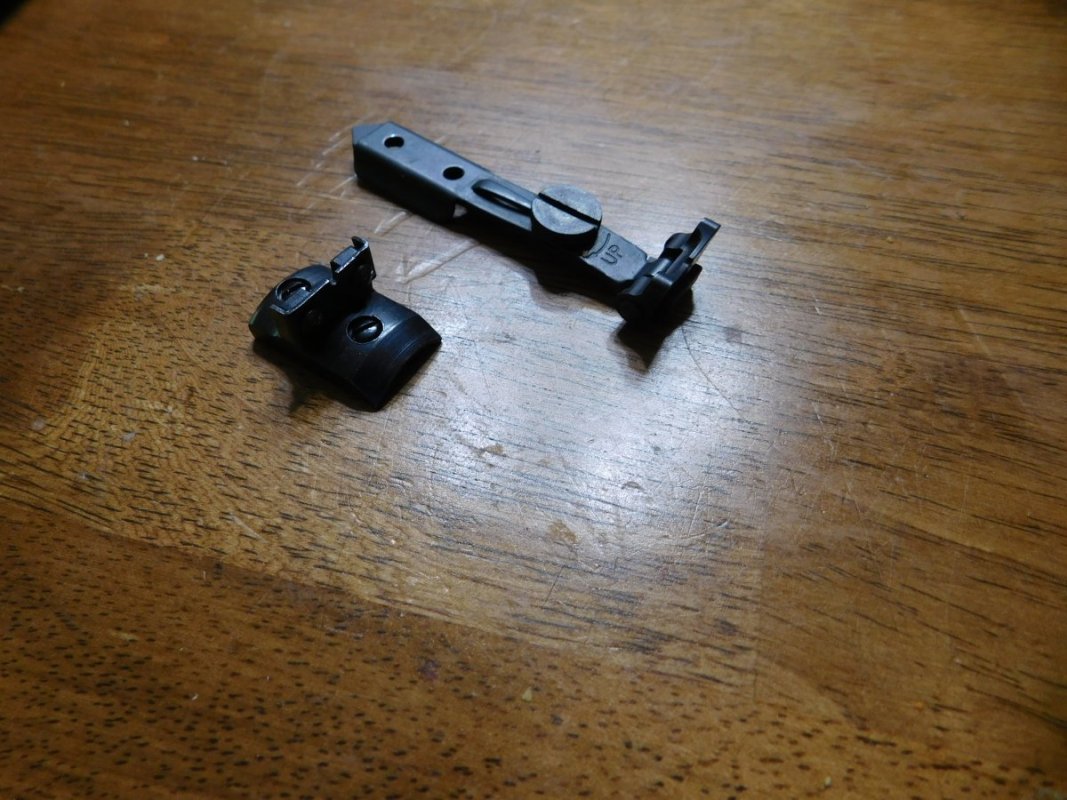
Ready for its third boiling and carding.

i.imgur.com_5Od9kOh.jpg


i.imgur.com_aSvySwM.jpg


The part, fresh from the third boil in good old tap water.

i.imgur.com_yXMNrTC.jpg


Beginning the carding in preparation for the next rust cycle. Removing all the loose smudge with 0000 steel wool......nope, I ain't degreased a piece of steel wool for this work in years. Whatever keeps the wool from rusting, don't keep the parts I rub down from rusting. Course, that may be where I get an occasional spot from but I'm inclined to believe it to be fingerprinting or less than adequate prep work. In any event, used to degrease the wool but saw no difference in the final output, so, I eliminated that particular step.

i.imgur.com_0nbabuQ.jpg
 
Some more after rust. Its normal and it settles down over a period of days or a few weeks. Not as bad as I expected with the heavier texture on this frame but......

i.imgur.com_9a6Pw1a.jpg


Time to warm it again with another coat of beeswax/vasoline. Just to ouch temperature after glopping on the mix.

i.imgur.com_cLTjvZW.jpg


After melting for a bit, hang it to cool and I'll come back for near final assembly.

i.imgur.com_pKledGq.jpg


More photos this evening as this one approaches completion. As predicted, likely done this weekend and then just to sit until I'm satisfied with the browned finish, maybe another two weeks.

Last of the jobs are to finish knocking back and sealing the brown. Future maintenance of the finish is as simple as wiping it down with bore butter or other similar muzzleloading finish preservatives.

I need to make up a shoulder nut for the ejector rod housing and blue it. That'll be from La Salle fatigue proof steel and have a small shoulder in the base to retain the ERH and prevent any movement under heavy recoil. It can be as simple as a tapered bottom on the pinch nut.

Last item will be to clearance the head of the cylinder pin. It just slides over the barrel band. Assembly and disassembly is possible but a bit snugger than I'd like so, that'll get reblued again once clearanced for ease of assembly and disassembly.
 
Coming together. Still heavily coated in beeswax. I'll wipe it down and start the follow up with Bore Butter on the brown.

i.imgur.com_tmWWwRX.jpg


A simple relief on the back side of the Cylinder pin to make room for the band at the end of the barrel. A bit of touch up blue and the gun assembles and disassembles now with no more difficulty than a factory set up.

i.imgur.com_mOzzm4u.jpg


A few quick pics. Not the best light, its fading but you can see the heavy texture in the brown and the smoother black and brass. Better pics later when the final bits are done and installed......but, This one is looking like it did in fact make that 500 mile solo walk for a Gals heart across the Alaskan Frontier to the Coast....and then back when love wore out its welcome?

i.imgur.com_VZXoFIB.jpg


i.imgur.com_bZaWiqH.jpg


i.imgur.com_CrSbQpo.jpg


i.imgur.com_f9ZGybY.jpg
 
almost done. Gotta make up a shouldered pinch nut for the ejector rod housing to lock it down for zero movement under recoil.
 
Wow, great looking gun, and great write up. I bet you spend as much time taking pictures and writing posts as doing the work.

There is no way I would have the patience to do what you do.
 
Back
Top Bottom